


The Ultimate Guide to Custom FSL Embroidery Digitizing in 2026
Introduction
You have seen those beautiful lace ornaments, delicate earrings, and intricate bookmarks that look like they came from a fancy boutique. Then you realize someone stitched them on a regular embroidery machine. No fabric. Just thread. That magic is called freestanding lace, and it all starts with understanding the rules of the game. Custom FSL Embroidery Digitizing follows completely different principles than standard embroidery. If you try to stitch a normal design on water-soluble stabilizer, it will fall apart the moment you wash it.
The difference is simple. In regular embroidery, the fabric provides the strength and holds the stitches together. In freestanding lace, there is no fabric at all. The thread itself must create the entire structure . This means FSL designs need much higher density, stronger underlay, strategic connection points, and very specific stitch types. Let me walk you through everything you need to know to create stunning FSL designs in 2026.
What Is Freestanding Lace Embroidery?
Freestanding Lace embroidery is a special type of machine embroidery where you stitch the design only on water-soluble stabilizer instead of fabric . After you finish stitching, you rinse the stabilizer in water and it melts away. What remains is a beautiful lace shape that stands on its own without any fabric behind it.
People use FSL to make ornaments, earrings, bookmarks, Christmas decorations, lace patches, and even elegant neckline inserts for dresses . The design possibilities are endless, but the digitizing requirements are very specific.
The key difference from regular embroidery is support. In normal embroidery, the fabric provides the strength and keeps the stitches secure. FSL has no fabric, so the thread itself must create the entire structure . This makes FSL far more sensitive to density, underlay, and stitch direction.
How FSL Digitizing Differs from Standard Embroidery
Let me break down the key differences so you understand why FSL digitizing requires a completely different approach.
Support system is the biggest difference. In normal embroidery, the fabric provides the strength and keeps the stitches secure. FSL has no fabric, so the thread itself must create the entire structure .
Stitch types used also differ. FSL relies more on fill stitches to build a solid base and uses fewer satin stitches. Satin is often too loose or too narrow to support itself. FSL also avoids open gaps that would leave the lace weak or unstable .
Stitch density is much higher in FSL. A digitizer's goal with non-lace embroidery designs is to create a beautiful piece with as few stitches as possible. When digitizing for lace, the stitch count is incredibly higher . If you see spaces between your stitches, that is a tell-tale sign that your lace will not hold up when the stabilizer is removed .
Impact of mistakes is also different. In regular embroidery, small errors like loose gaps or light density usually do not cause major problems. In FSL, those same mistakes can destroy the whole piece. When you wash away the water-soluble stabilizer, any weak area can tear immediately .
Core Principles of FSL Digitizing
Professional FSL digitizers follow several key principles to ensure their designs stay strong after washing.
Build a Strong Foundation Layer
Every FSL design needs a dense fill layer to build the base of your lace. This minimum density keeps the design strong after the stabilizer dissolves. Add a random or lattice underlay to lock the stitches together and prevent the lace from tearing .
Use Multiple Layers with Different Stitch Orientations
A common technique involves creating three layers with different stitch directions. Duplicate your shape, then create stitches for each layer at different angles. This crisscrossing pattern gives the lace strength in multiple directions . When the stitches lock together from different angles, they cannot pull apart easily.
Include Connection Points
Connectors hold the lace together during washing. You need to include small linking bridges throughout the design. Place them in areas where they blend naturally into the pattern. Keep each connector thick enough to stay strong but thin enough to stay hidden .
Set the Correct Density
Aim for a density between 0.35 and 0.45 millimeters depending on your software . FSL needs higher density than normal embroidery because it has no fabric. If the density is too high, the design forms knots. If it is too low, the lace breaks apart .
Add a Satin Border When Needed
Use satin stitches if you want clean, smooth edges. But keep the satin narrow because thick satin can curl or become too heavy for lace. Only add satin where it supports the design without weighing it down . The border is essential because it holds the FSL design together .
Software Options for Creating FSL Files
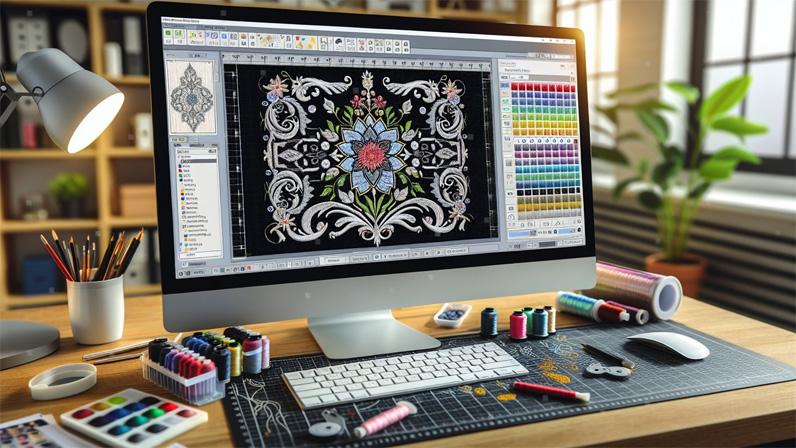
To create clean and stable FSL designs, you need software that gives you control over density, underlay, and stitch angles .
Wilcom Embroidery Studio is one of the most powerful digitizing programs. It offers excellent control for FSL structure, connectors, and fills. This is what professional digitizers use.
Hatch Embroidery is a lighter, more affordable version of Wilcom that still provides the features needed for FSL digitizing. Great for serious home users and small shops.
Embird Studio NEXT includes specific tools for FSL creation, including the Mesh tool for creating loose fills and the Overlock mode for satin borders . The Mesh tool can create a wide range of fills, but for FSL, you want fills that form an intertwined net or grid .
Bernina Embroidery Software 9 also supports FSL digitizing with built-in lacework tools. You can use the Lacework fill in the Stitch Toolbar and pattern libraries to create beautiful freestanding lace designs .
Ink/Stitch is a free and open-source tool. It works for basic FSL, but it has limitations in density control, underlay options, and advanced editing .
Step by Step: Digitizing a Simple FSL Design
Let me walk you through the general process of digitizing an FSL design using professional software concepts .
Step 1: Start with Clean Artwork
Choose artwork with geometric or repeating patterns because they create a strong lace structure. Avoid very thin lines or tiny gaps since they can break easily after the stabilizer dissolves. If you are using a photo or hand-drawn sketch, convert it into a clean outline or vector. Clear shapes make it easier to digitize stable stitch paths .
Step 2: Create the Overall Shape
Use a tool like the Mesh tool in Embird or the shape tools in Wilcom to create your base shape. For a simple example, you might create overlapping circles and weld them together into a single shape .
Step 3: Generate the Foundation Fill
Apply a mesh fill that creates an intertwined net or grid. In Embird, use Net - FSL Grid or Net - Shapes with single-layer mode switched on. Adjust parameters like gap (spacing between inner lines), minimum and maximum stitch length . This foundation fill holds the entire design together.
Step 4: Create Openings for Lace Effect
Add holes or openings to create the lace look. In Embird, you can create a smaller shape and use the "To Opening" command to convert it into a hole within the main object. The object representing the hole must follow immediately after the object representing the parent fill .
Step 5: Add the Satin Border
The border holds the FSL design together. In Embird, you can convert the mesh contours into outline objects, then switch the outlines to Overlock mode. Select an overlock sample that creates zig-zag borders. Adjust parameters like spacing of stitches (density), width, cell length, and cell path .
In Bernina software, you select the shape, click on the Lacework fill in the Stitch Toolbar, and choose a pattern from the library .
Step 6: Add Connection Points
Throughout your design, add small linking bridges. In Wilcom or Hatch, you can manually add connecting stitches between different sections of the design. These connectors prevent the lace from falling apart when you wash away the stabilizer .
Step 7: Set Density and Underlay
Set your fill density between 0.35 and 0.45 millimeters . Add underlay like lattice or zigzag to support the lace structure. These underlays create stability without adding bulk.
Step 8: Test the Design
Always test your design before final use. Stitch it out on two layers of water-soluble stabilizer at a slower speed, around 500-600 stitches per minute . After stitching, rinse the stabilizer gently and let the lace dry completely before checking its strength.
Common Mistakes That Ruin FSL Designs
Let me save you from the errors that destroy freestanding lace.
Using too much satin stitch is a classic mistake. Satin stitches look clean, but using them everywhere makes the lace collapse. Satin is not strong enough to hold the structure once the stabilizer dissolves .
Leaving large gaps weakens the lace. Big empty spaces create weak points. When the stabilizer melts, these open areas can tear or cause the entire piece to lose its shape .
Skipping the foundation fill is a guaranteed failure. Without a solid base layer, the lace has nothing to support it. Always include a strong foundation fill before adding decorative details .
Using cotton thread leads to breakage. Cotton thread is soft and weak. Use polyester instead because it is stronger, shinier, and can handle dense stitching without breaking .
Incorrect density ruins everything. Density that is too low makes the lace fragile. Density that is too high creates knots and tension issues. FSL needs balanced, slightly heavier density for proper strength .
Materials You Need for Stitching FSL
Let me tell you what supplies work best for freestanding lace .
Thread: Use 40 weight polyester thread. Polyester is strong, shiny, and durable. It handles dense stitching much better than cotton.
Needle: Use size 75/11 or 80/12. These sizes handle tight fill stitches without shredding the thread. A dull needle can damage the stabilizer, so always start with a fresh one .
Stabilizer: Use water-soluble stabilizer, the fabric-type that feels like a thin cloth rather than clear film. The fabric-type offers strong support during stitching and helps the lace keep its shape . For most FSL projects, hoop two layers of water-soluble stabilizer .
Bobbin thread: Use the same thread on the bobbin as on top. For lace, matching bobbin thread matters more than in regular embroidery because both sides of the lace are visible .
Speed: Run your machine at 500 to 600 stitches per minute. The stabilizer is not as strong as fabric, so slower speeds prevent tearing .
Conclusion
Custom FSL embroidery digitizing represents a completely different approach than standard embroidery files. Freestanding lace has no fabric backing, so every stitch must work together to create a self-supporting structure. Higher density, stronger underlay, strategic connection points, and minimal satin stitching are the keys to success.
Use polyester thread, a 75/11 needle, and fabric-type water-soluble stabilizer. Run your machine at moderate speeds. Always test your design before committing to a final project.
Whether you digitize your own FSL files using software like Wilcom, Hatch, or Embird, or you purchase ready-made designs from trusted sources, the result is the same. Beautiful, delicate lace that stands on its own and impresses everyone who sees it.

 English
 Arabic
 French
 Spanish
 Portuguese
 Deutsch
 Turkish
 Dutch
Dutch
 Italiano
 Russian
 Romaian
 Portuguese (Brazil)